
La pierre angulaire de notre succès
Elevator guide rails are a small-looking but safety-critical part of any elevator system. Poorly installed, worn, or mismatched rails cause rough rides, noise, accelerated wear of guide shoes, and — in extreme cases — unsafe operation. The following sections provide professional, practice-tested diagnosis steps and repair/maintenance actions you can apply on site or use to scope work for a specialist contractor.
Why it matters (brief): Misalignment between rail sections or between the rails and the hoistway plumb line produces step changes at joints, uneven contact with guide shoes or rollers, and ride-quality problems. Modern installation tolerances are tight — good installation practice checks straightness and joint alignment as part of every rail installation.
1. Visual run-through of the rail joints while moving a guide shoe or trolley slowly by hand.
2. Measure rail straightness and joint offsets using a straightedge, dial gauge, or laser alignment tool. Many manufacturers require joint straightness within fractions of a millimetre (see installer spec examples).
3. Check bracket and fishplate locations for missing shims or loose fasteners.
1. Incorrect shimming during installation.
2. Warping from shipping/handling or thermal stresses.
3. Settlement or movement of mounting substrate (concrete/wall anchors).
1. Tighten and torque rail bracket bolts to spec; re-verify alignment.
2. Use shims at fishplates to correct small in-plane offsets; final adjustment is normally done by shimming rather than forceful bending.
3. For larger straightness errors, use controlled straightening equipment or replace the affected section — avoid ad-hoc hammering; professional straightening rigs or specialist contractors produce predictable results.
4. Always re-check straightness along a length after any adjustment and document readings so the client and maintenance records reflect the correction.
Why it matters (brief): Scratches, gouges, corrosion, or flattened bearing surfaces accelerate guide shoe wear, introduce vibration and noise, and reduce the margin before replacement is required.
1. Inspect rail surface under good lighting; feel along the running face for ridges or depressions.
2. Measure wear or profile changes against a new-rail template or manufacturer's drawing (critical for high-rise, where ride quality is sensitive).
3. Check for localized damage at joints or near brackets where impacts commonly occur.
1. Local grinding and polishing: Minor scratches and burrs can be ground flush and finished to restore a smooth running face. Follow by deburring and applying an appropriate corrosion inhibitor.
2. Build-up welding + machining: For deeper gouges or reduced cross-section you can apply weld build-up (compatible filler material), then machine or grind back to spec — only when welding is allowed by the rail material and approved by the rail/shaft engineer.
3. Replacement of rail section: When deformation or cross-section loss compromises straightness or structural integrity, replace the affected section. Suppliers commonly sell matched sections to maintain straightness and hardness specs.
1. Welding on rails changes metallurgy and hardness; always confirm with the rail manufacturer and perform post-repair hardness checks as required.
2. Never leave grinding debris in the hoistway; clean thoroughly to avoid contamination of guide shoes.
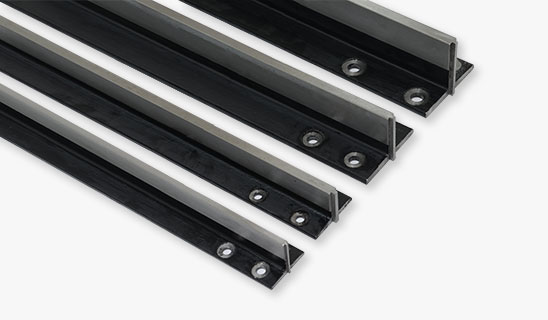
Why it matters (brief): Fishplates, bolts, and joint faces transmit forces and keep rail pieces aligned — if joints are loose or damaged, the ride will be inconsistent and joint wear will accelerate.
1. Physical check of fishplate torque and bolt condition.
2. Feel for vertical or lateral play at the joint by moving the car slowly through the joint.
3. Inspect fishplate faces for corrosion, ovalized bolt holes, or cracked welds.
1. Retorque and replace hardware: Replace stretched bolts or worn fishplates; use the manufacturer-specified grade and torque values.
2. Joint re-machining or new fishplates: If joint faces are distorted or bolt holes elongated, install new fishplates or re-machine the faces for a tight fit.
3. Shimming for fine adjustment: Final alignment across the joint is commonly achieved with carefully placed shims — this is standard practice on professional installations.
If joint faces are cracked, or the rail edges have lost section, schedule section replacement and structural review.
Why it matters (brief): Vibration and noise are direct indicators of rail/guide compatibility, wear, or installation problems and are what passengers notice first.
1. Misalignment or poor straightness at joints.
2. Worn guide shoes (liners), hardened contaminants, or incorrect guide shoe type for the rail.
3. Rail surface roughness, loose fasteners, or insufficient damping at brackets.
1. Narrow down the frequency and location of the noise by running the car slowly and noting floor levels and speeds where noise peaks.
2. Inspect guide shoes for glazing, uneven wear, cracks, or embedded debris.
3. Confirm that the installed guide shoe type (sliding vs roller, material grade) matches the rail spec.
1. Replace worn or glazed guide shoes; re-adjust gaps to manufacturer tolerances. Routine shoe replacement often restores quiet operation.
2. Correct any rail misalignment or surface defects (see sections 1–2).
3. Tighten loose brackets and add soft pads or damping where appropriate (follow manufacturer guidance).
Establish a documented inspection routine (monthly visual checks, quarterly functional checks, annual detailed measurements). For high-use installations, increase frequency.
Keep a log of straightness and joint measurements after installation and after any repair.
Use a product approved for elevator guide rails and compatible with guide shoe materials; many OEMs offer proprietary rail lubricants and oils. Avoid general-purpose shop oils that attract dust.
Apply lubricant sparingly and in the locations recommended by the guide shoe or car manufacturer — excess lubricant creates contamination and accelerates wear of sliding liners.
Keep replacement guide shoes, fishplate kits, and a pair of rail joint bolts on hand for rapid response.
Source replacement rails or matched straightness sections from certified suppliers to retain ride quality.
Verify and retain manufacturer drawings, rail straightness certificates (ISO/EN or supplier control reports), and installation tolerances; these are critical for future repairs and procurement decisions.
Well-executed guide rail installation and disciplined, documented maintenance are the cheapest ways to preserve ride quality and extend component life. When a problem exceeds what on-site crews can correct (major straightness errors, metallurgical damage after welding, or recurring joint failures), engage a specialist rail/shaft contractor who can provide controlled straightening, matched section replacement, and post-repair verification.